Face off : Three(.js)
23rd September, 2019
4 min read
I've been interested in photogrammetry which involves lots of photos, but what is the least number of photos required? Well, it turns out that all you need is one photo.
In this article I'll quickly run through how to generate a 3d mesh from a photograph, and then use netlify to publish a threejs based model viewer to see the final result. The process is entirely manual at the moment!
How to create a 3d mesh?
After some failed experiments with mobile photogrammetry apps I decided it was too difficult to easily capture many photos.
OpenCV
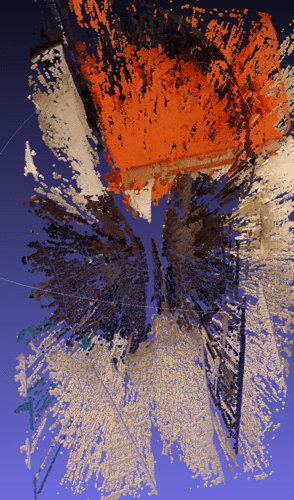
I then tried OpenCV Stereo SGBM which uses stereo photos, compares the differences and uses geometry, and some advanced techniques, to estimate a depth map, then colour it uses the original image.
This was very promising when using the example photos, but despite spending a lot of time on it, I found it impossible to get even barely passable results. The image below shows headphones resting on an orange book - and that is the best angle to view it from!
This is definitely something I will come back to. I didn't try it at the time, but there is a tool to help tweak the parameters. The other disadvantage is that building OpenCV is an arduous process.
Machine Learning to the rescue!
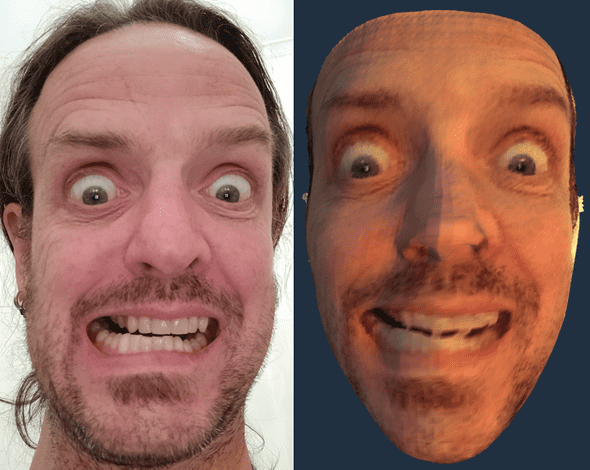
I used the popular PRNet CNN (convolutional neural net) to generate a wire mesh, which met with immediate success!
There is an accessible(ish) explanation of how the process works.
Is this a fake?
More like a deep fake!
PRNet is trained to generate a UV map, which encodes both volume and shape of a 3d object. Three important elements can be generated from this UV map
- sparse feature point prediction - eyebrows, eyes, nose, mouth, lips, and chin
- dense feature point prediction
- full 3-dimensional mesh model, with colors from the input image.
Show me the code!
It's not just an academic paper there is fully working example code
It takes a little bit of work to get this running I'd recommend using my Pyenv configuration advice from a previous article.
I stuck to the requirements to get this working - Python 2.7 - so I didn't investigate if more recent versions of Python would work. If you do bump your Python version be aware that as of publishing (September 2019) dependencies of TensorFlow limit Python to version 3.6.
$ pyenv virtualenv 2.7.14 prnet
$ pyenv local prnet
You'll also need to install dlib.
$ pip install --upgrade dlibI'd recommend upgrading pip and setuptools to the latest version before you install the project dependencies
$ pip install --upgrade pip setuptoolsNow you can install the dependencies
$ pip install -r requirements.txtGenerating the mesh
You'll need some images saved in a known directory. Once you have that, simply run:
$ python demo.py -i {the directory holding images with faces} -o {output directory for the obj files}You'll probably see lots of warnings (I did) which would likely be reduced or removed by upgrading your Python version, but I'm not doing to until later in the project!
In your output folder you should see a .obj file for each image you provided. Note, you will only see one face per image - there is no automatic support for multiple faces.
Viewing the output
I used the free and capable MeshLab to immediately open and view the models - I laughed at my stupid face spinning before me!
Even though it was not a goal of my mystery side-project, I wanted to leverage my webdev skills to put this online for all to see - everyone should be laughing at my stupid spinning face!
Threejs and Netlify to the rescue!
I use Netlify to publish my Gatsby based blog, so I knew it was going to do the heavy-lifting of deploying my new 3d monster gallery.
I didn't want to be messing about with bundling the 'app' so I just wrote a little shell script to copy the threejs library and associated support code from the node_modules directory to the src folder where I could import it into my es6 modules.
The netlify build settings I used are:
- Repository : github.com/mlennox/three-dee-mee
- Base directory : Not set
- Build command : sh prepare.sh
- Publish directory : src
The full, working code is on github and the actual working demo is available at https://thirsty-hypatia-f27848.netlify.com/ and looks like this (it may take a few seconds to initialise)
Just click the gurning visages in the row of thumbnails to load the associated three-d mesh, and you can control the hideous visage by clicking, dragging, and scrolling to zoom.


